
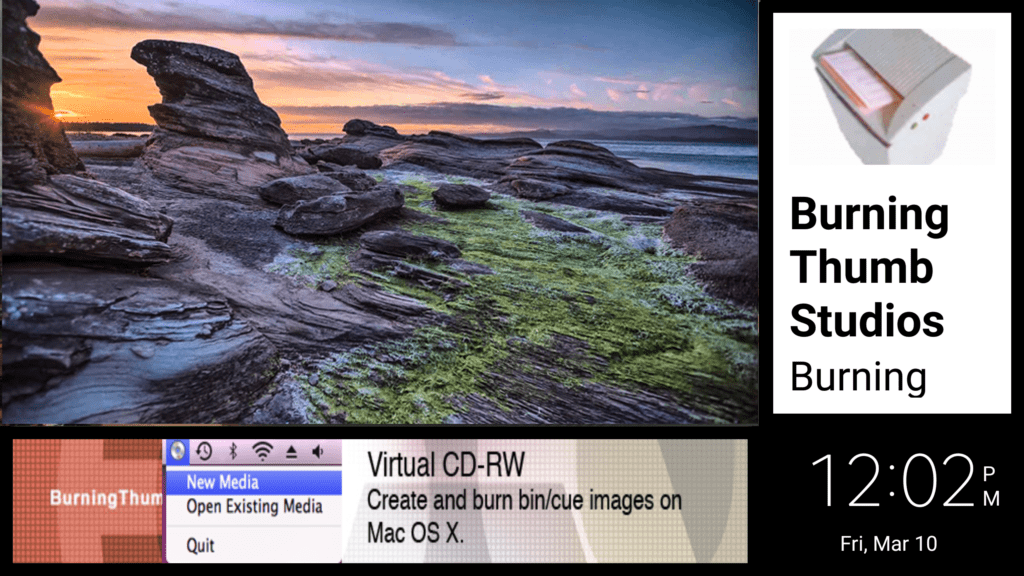
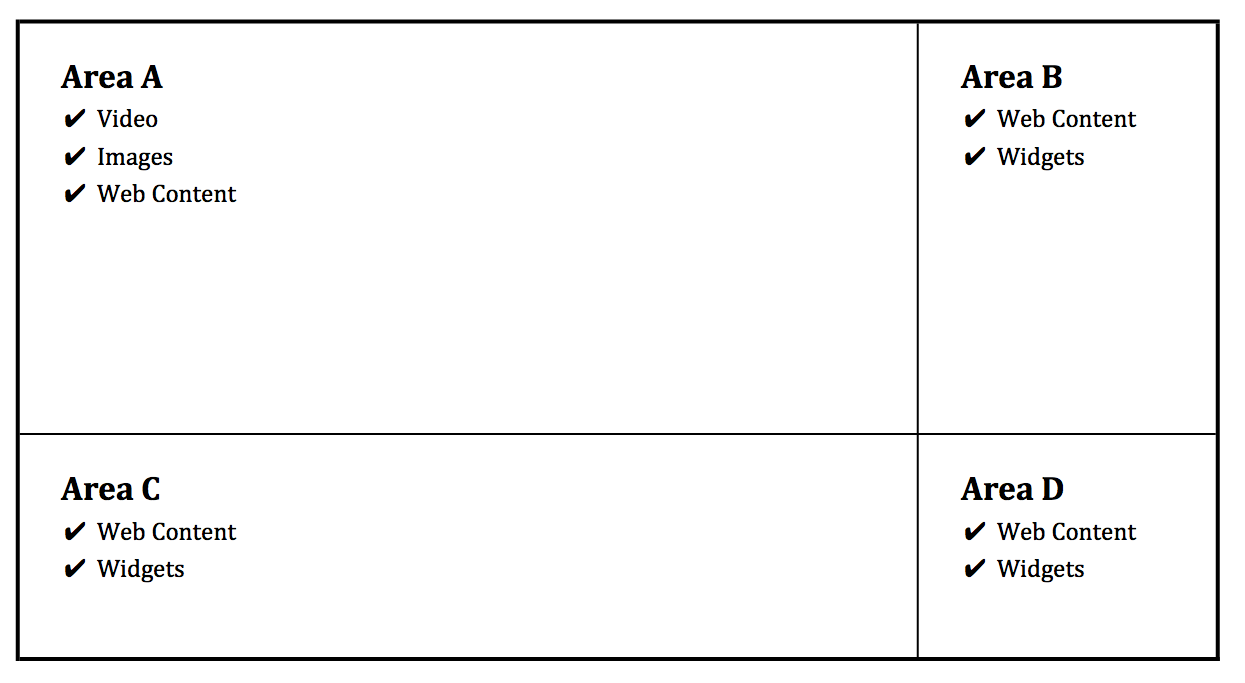
Video Kiosk has a Split Screen Mode, which divides the playback screen into 4 areas, A, B, C and D, allowing you to play your content loop in area A, while you run widgets or URL-based content in areas B, C, and D. Video Kiosk includes some built-in widgets you can use.
Instructions: How to configure Split Screen Mode
To use Split Screen Mode, follow these easy steps:
- Enable Split Screen mode.
If you haven’t already done so, enable Split Screen Mode.
Go to Video Kiosk Settings > Widgets > Enable widgets and check the checkbox.
Video Kiosk will re-launch and display a 4-panel split screen. - Configure the Widget Areas
Configure the widget Areas B, C and D with the widgets | URLs to display. (You can use the built-in widgets or a third-party widget.)
For each of Areas B, C and D, go to Video Kiosk Settings > Widgets > Choose Area x Widget and select and configure the widget(s) and URL(s) to display.
Each widget area can display multiple app widgets or URL-based content.
Built-In Widget. To Display a Built-In widget, click the “BUILTIN” button. Choose a widget (or Widgets) from the list. To configure each widget, refer to the “Using the Built-in Video Kiosk Widgets” section below.
Each widget area can display multiple app widgets or web-based content. Add any other widgets to be displayed in that Area.
Default Min(utes). If you’ve configured more than one widget in an area, each will be displayed for this amount of time, in minutes. The default is 60 minutes. Modify, if required.
Widget. To Display a third-party widget, click the “WIDGET” button. Choose a widget (or Widgets) from the list. To configure each widget, refer to the documentation that came with your widget.
Each widget area can display multiple app widgets or web-based content. Add any other widgets to be displayed in that Area.
Default Min(utes). If you’ve configured more than one widget in an area, each will be displayed for this amount of time, in minutes. The default is 60 minutes. Modify, if required.
URL. To Display a URL-based content, click the “URL” button. The web URL can be any valid protocol including http://, https:// (remote content) and file:// (local content). Enter each URL.
Default Min(utes). If you’ve configured more than one URL in an area, each will be displayed for this amount of time, in minutes. The default is 60 minutes. Modify, if required - (Optional) Configure the “Monitor Internet” feature.
If your widgets | URLs are dependent on the Internet, they may behave in an unexpected manner if Internet connection is lost. You can configure Video Kiosk to monitor the Internet and return to full screen mode when Internet connection is lost. To enable this feature, go to Video Kiosk Settings > Widgets > Monitor Internet, and tick the box.
- (Optional) Configure the “Arrange in rows” option.
The default is to arrange your widgets in columns.
- (Optional) Adjust the widget area layout.
Optionally, adjust the widget area layout and the widget area padding. For more information, refer to the “Customizing Widget Area Layout” section below
How to Return to Full Screen Mode
To return from Split Screen Mode to Full Screen Mode,
- Go to
Video Kiosk Settings > Widgets > Enable
and uncheck the checkbox.
Video Kiosk will return to Full Screen mode.
Default Display
Each area has a default it will display. When split screen mode is enabled, the following will be displayed:
- Area A will display your content loop
- Areas B, C and D will display your background, or a black screen if no background is configured
Considerations when displaying Widgets
Where to find widgets
- Video Kiosk includes some built-in widgets
- Widgets are available from the Google Play Store.
- You can develop your own widgets and sideload them onto the device.
Widget Readability
Because Areas B, C and D are of different sizes, you need to give some consideration to how well the widget will be seen when placing the widget in one of the areas.
When deciding on which area to place a widget, consider
- how the widget was intended to be displayed (landscape, portrait or square),
- the device’s display size (TV or tablet or phone) and
- how far away the viewer will be from the screen.
Built-in Video Kiosk Widgets
Video Kiosk includes a set of built-in widgets – the Date and Time widget, Image Folder, widget, RSS Feed widget and URL widget.
When you pick a built-in widget, the settings for that widget are displayed. You can configure the widget
- using these settings or
- using an XML file. For more information about using an XML file, refer to Appendix C – Built-in Widget XML Settings in the Video Kiosk Users Manual.
Date and Time Widget
Use the Date and Time widget to display the Date and Time in the corner of the screen.
Image Folder Widget
Use the Image Folder widget to automatically resize and display a group of images from a folder.
RSS Feed Widget
Use the RSS widget to display RSS News feeds from remote servers.
URL Widget
Use the URL widget to display content from any valid local file or remote https:// page.
Considerations when displaying URL-based Content
Because Areas B, C and D are of different sizes, you need to give some consideration to how well the URL-based will be seen when you link to it in one of these areas.
When deciding on which area to use, consider
- how the content is intended to be displayed (landscape, portrait or square),
- the device’s display size (TV or tablet or phone) and
- how far away the viewer will be from the screen.
Customizing Widget Area Layout
You can use the Video Kiosk’s split screen default layout, or you can customize the layout by adding or removing padding between the areas or by changing the size of the widget areas.
Adjusting Widget Area Size
Widget Area Size is the boundaries of the four Areas (Areas A, B, C and D) including the area used by the widget and the padding.
By default Video Kiosk assumes a 1080p display in landscape orientation with a screen resolution of 1920×1080. The horizontal weights are 1426 and 494 and the vertical weights are 800 and 280. So on a 1080p display the pixel sizes will be as follows Area A: 1426×800, Area B: 494×800, Area C: 1426×280 and Area D: 494×280. The best way to understand | use the layout weights is to determine the horizontal width and vertical height of your display based on its orientation and then set the weights to the number of pixels that you want in your layout.
To adjust a widget’s area size,
- Go to Video Kiosk Settings > Widgets > Horizontal weights and adjust the horizontal weight for the widget’s area.
- Go to Video Kiosk Settings > Widgets > Vertical weights and adjust the vertical weight for the widget’s area.
Adjusting Widget Area Padding
Padding is the area between the Widget area boundaries and the sides of the Widget. Each widget area has a default padding amount which allows the background to show through between the widget areas and aligns the widget within the area. If you’d like to change a widget’s placement slightly within it’s area, use the padding feature. Please note that the padding can be both positive and negative. For web URL content, additional padding and formatting may need to be included in the html description of the content.
To adjust a widget’s padding,
- Go to Video Kiosk Settings > Widgets > Area X Padding and adjust the padding in the widget’s area.
Example: Customizing Widgets

In this is an example, the split screen is using the default widget area layout and default widget padding.

In this example, the split screen is using the default widget area layout and the padding for Area A and Area D have been increased.

In this example, the split screen is using the default widget padding. To allow Area A to use the entire width of the screen, the horizontal weight of Area B has been set to O, while the horizontal weight of Area A has been set to the maximum for the screen resolution.