
Recently I was working with the Fungus asset in a Unity project. Because I wanted to use Fungus not using 2D sprites but using 3D models and characters, I had to make a small edit to remove the code where the Z value is hard coded to -10 on the View game object.
Once I had made that change, I could use Fungus views in 3D space so I imported my first 3D model of a space station.
For some reason that I did not yet understand, when the models were imported, my textures were not tiling as I expected, instead they were centered on mesh faces and “smeared” toward the mesh edges.
I did a fair bit of searching thinking this was a Cheetah or Unity issue but it turned out that it is actually an editor setting.
When I created my project I had selected 2D rather than 3D, and one of the things that doing this does, is change the way the Unity Editor imports textures.
If you select a 2D project, then the default texture import setting will be Sprite (2D and UI) with a Wrap Mode Clamp.
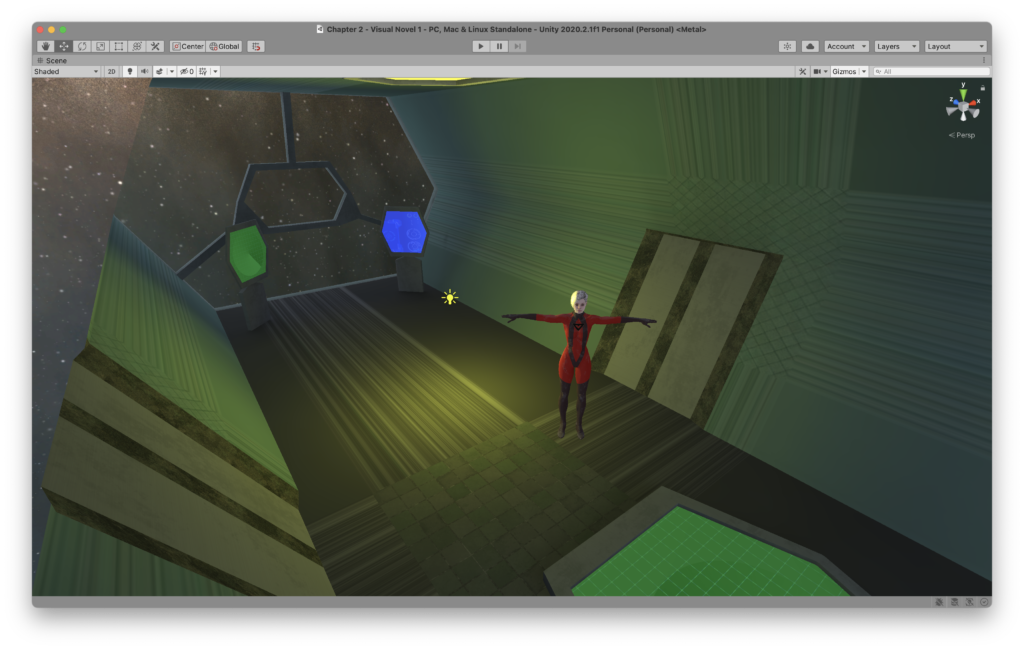
While those defaults will work fine for 2D textures, when you import 3D models you will get texture “smearing” for the parts of the texture that are outside of the normalized rectangle, as shown here (notice the wall and the floor tiles):
To fix this, you can do one of two things.
- Manually update the Wrap Mode to from Clamp to Repeat on each texture
- Change the editor setting Edit > Project Settings > Editor > Default behaviour mode > Mode from 2D to 3D so that the Unity Editor imports textures using Texture Type Default with sets the Wrap Mode Repeat automatically
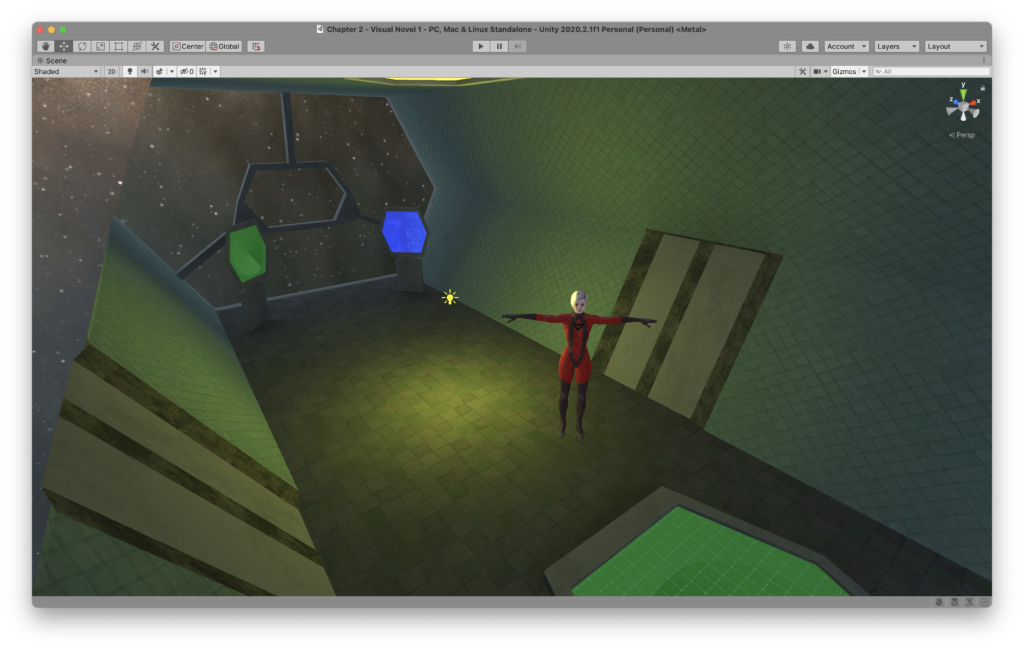
Because I had a lot of textures that I wanted to import, I choose solution number 2. And now my textures tile correctly as shown here (compare the wall the floor tiles to the previous image):
It took me longer than it should have to figure this out, hopefully this post can save someone else that time.
If you have a project where you have a lot of textures that you want to import in one way or the other, there is a third option that requires a bit of scripting but that you could use to create a 2D Texture and 3D Texture folder whereby the editor would automatically apply the import settings that you want provided you dropped the texture in the appropriate folder. But this solution is beyond the scope of this post. If its something you are interested in, and you can’t find it with Google, drop me a line and I’ll write up a separate post on how to do that.